MacOS on VirtualBox
It took me actually months to figure out exactly how do to this but at last!
INFO
Before we continue please keep in mind this was only tested on Linux VirtualBox, I cannot confirm whether this will work on Windows or not.
VirtualBox Setup
Install VirtualBox via your systems package manager and follow any other neccesary steps to get it working.
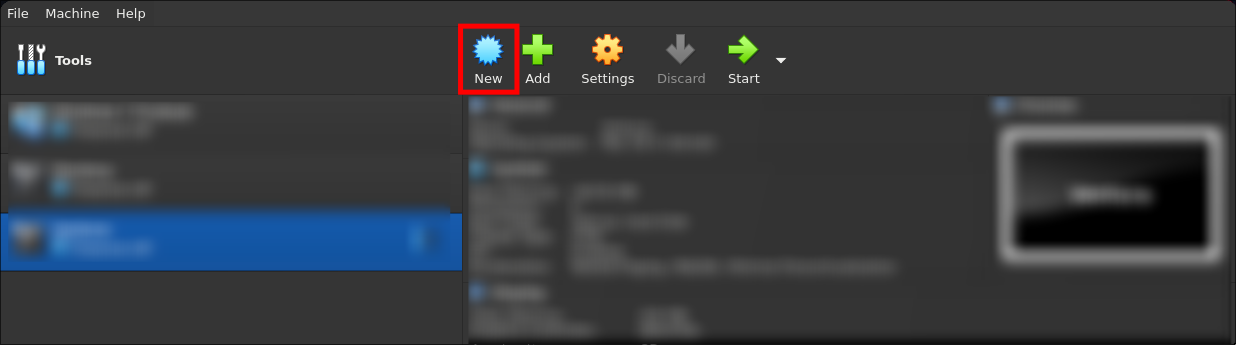
Once VirtualBox is setup its time to create a new MacOS Machine!
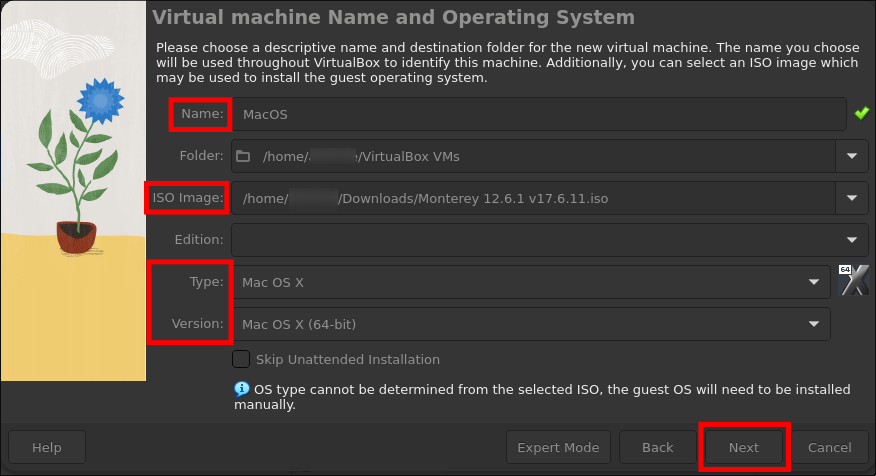
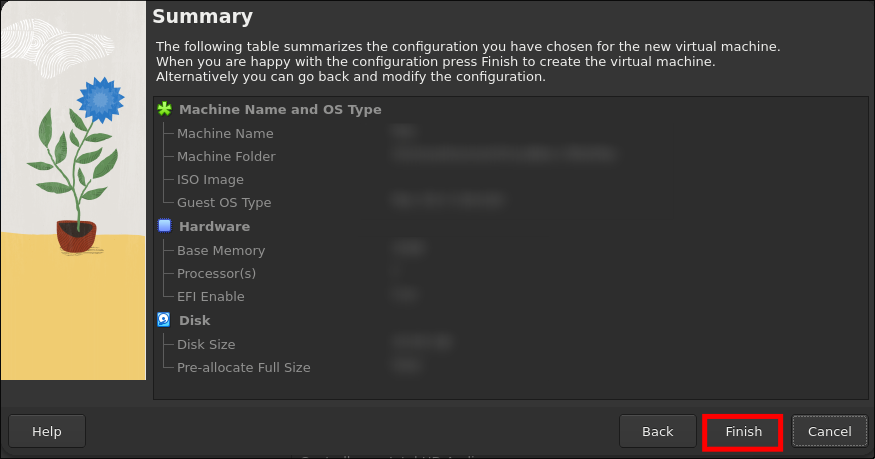
Next fill out the following fields, and for the ISO Image click the dropdown button then Other to select your MacOS ISO file.
INFO
I know most of you won't have access to a Mac to generate the ISO file so I have linked a couple of ISO's I have found to work. Password: WindsweptMac
Note
From my testing, versions of macOS newer than Montery do not work, but you are still welcome to try using this method as you may have better luck than I did.
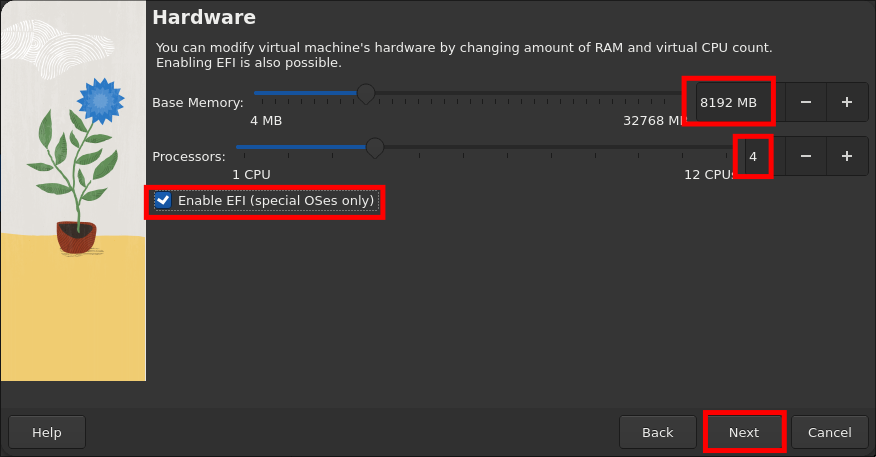
Next set your Memory to at least 4GB but 8GB or more is reccomended. If your on Windows use no more then half of your total memory. On Linux you can be a bit more flexible.
If you have a 6 Core CPU only use 4 Cores, you can use 6 but your host system is likely to struggle.
Next create a virtual storage medium that is at least 30GB large but 50GB+ is reccomended for extended use.
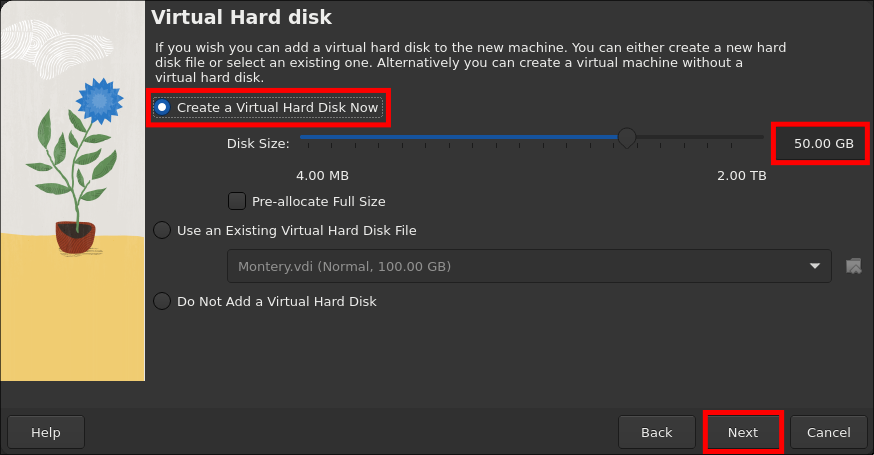
And that's all for that, just hit Finish.
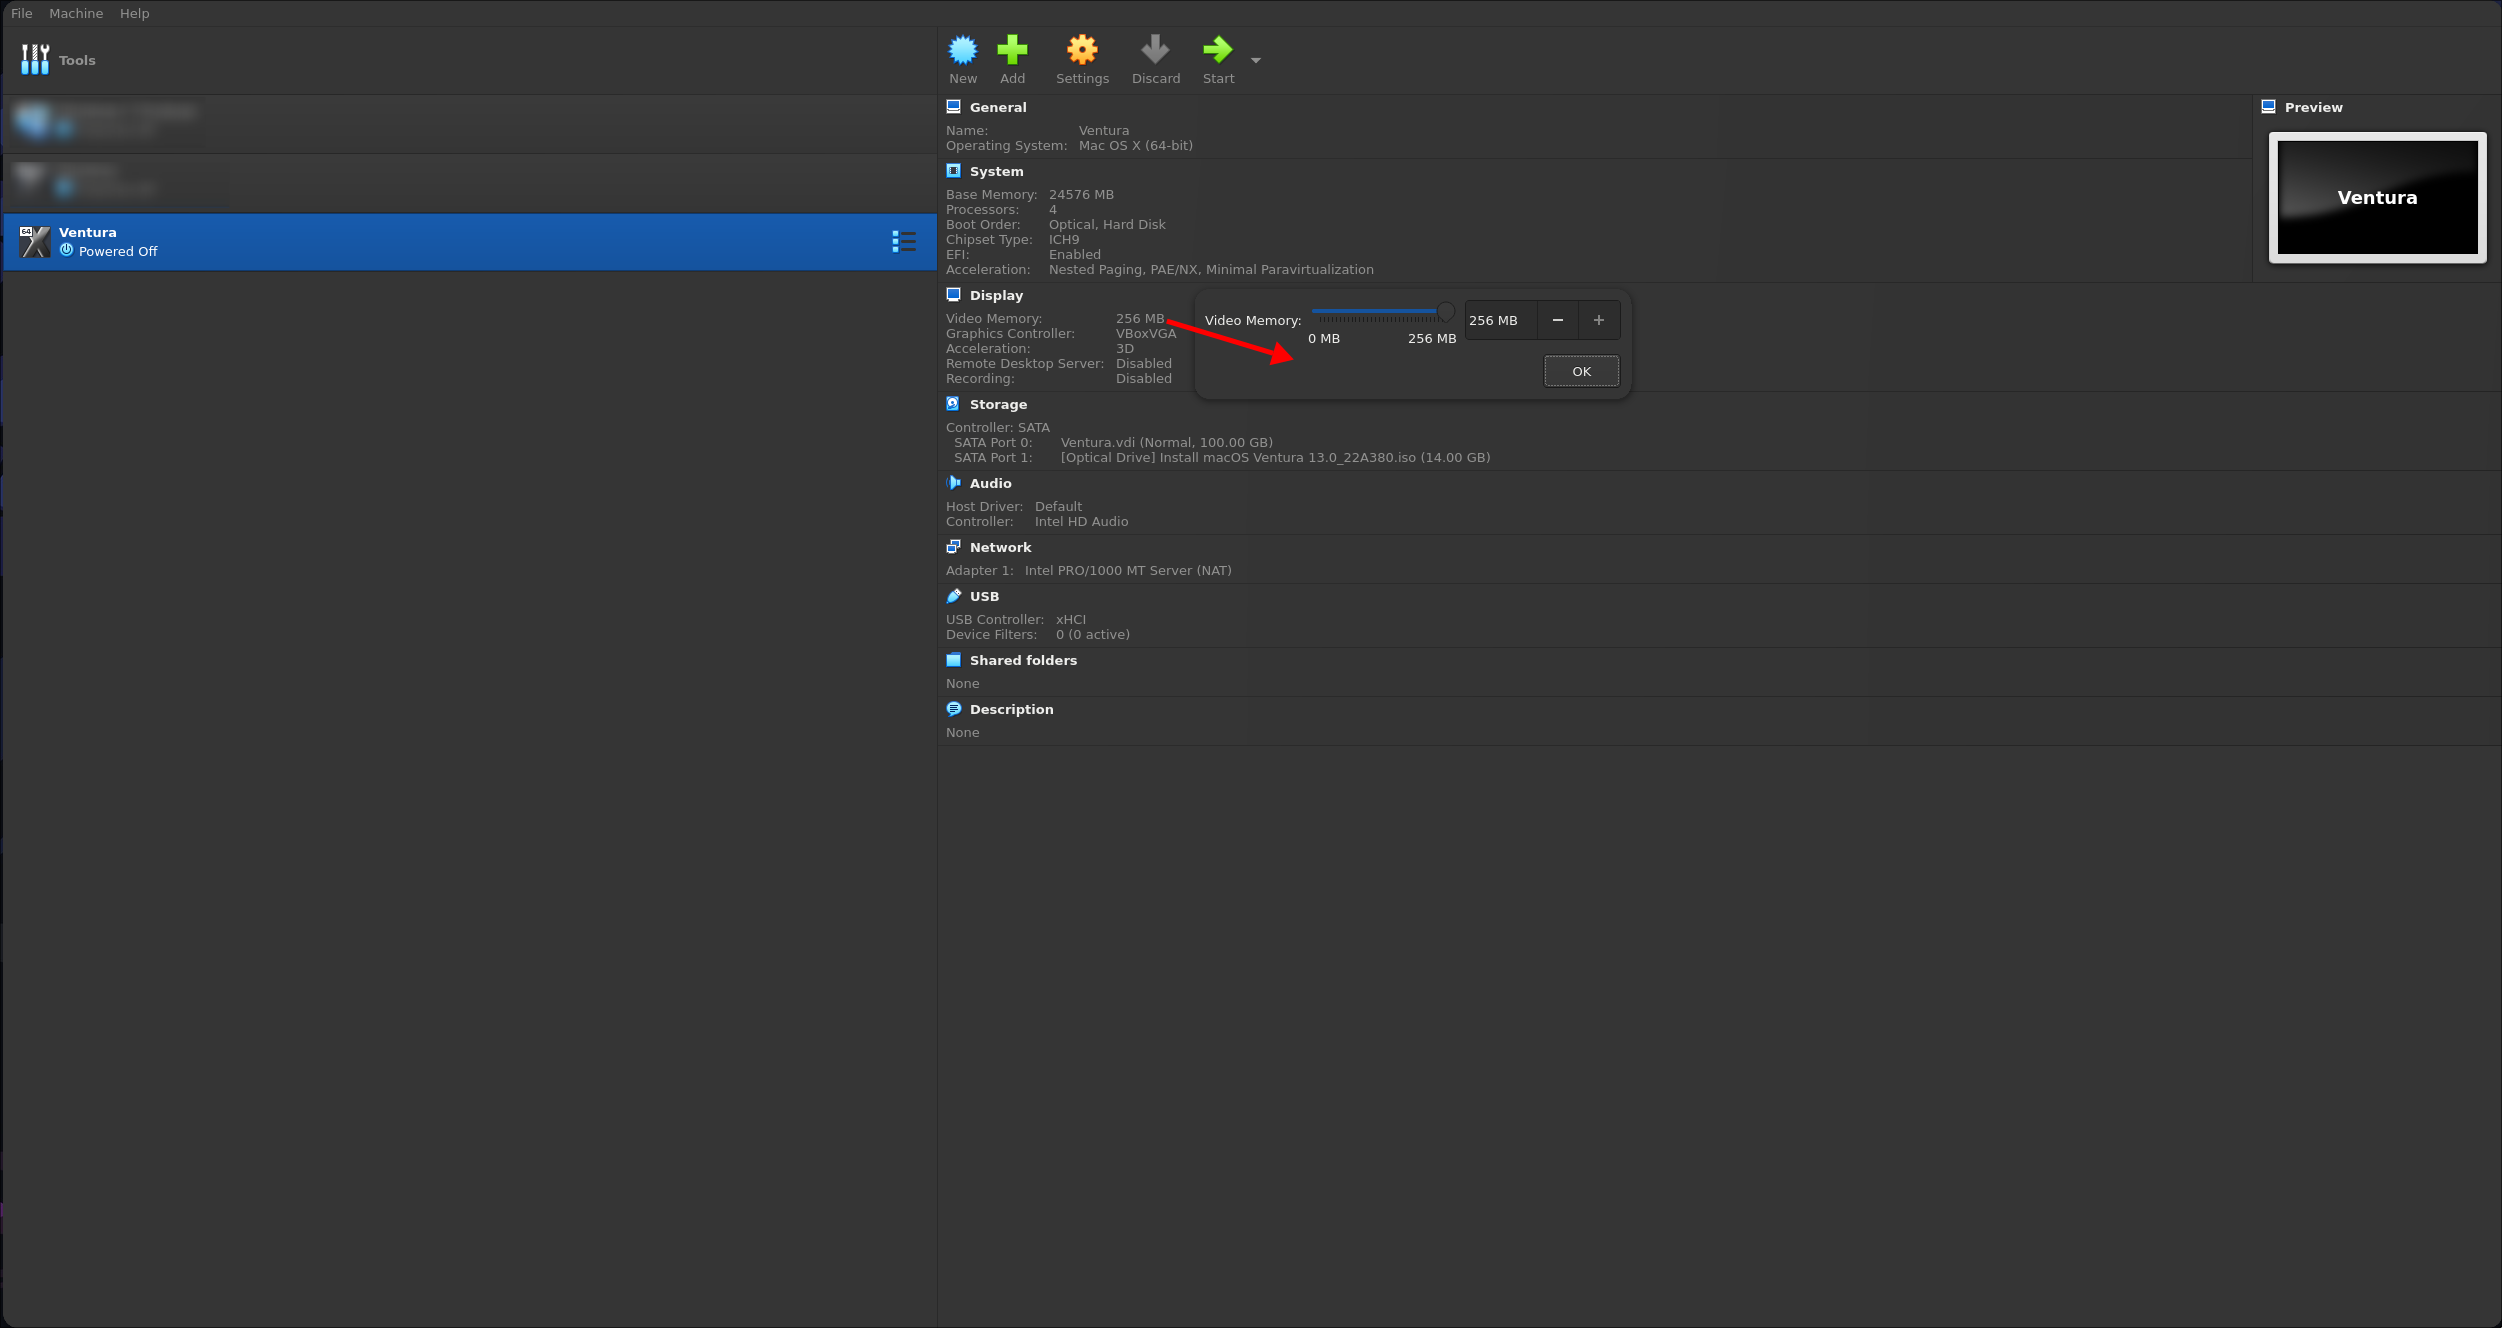
Next while selecting your newly made VM on the main page, click on the 16MB next to Video Memory under the Display section, pull the slider all the way up to 256MB.
Next click on the settings cog for your VM, follow the next set of instructions closely.
- System Tab > Uncheck "Floppy" under "Boot Order"
- Display Tab > Check "Enable 3D Acceleration"
- Display Tab > Set "Graphics Controller" to "VBoxVGA"
- USB Tab > Check "USB 3.0 (xHCI) Controller"
Now lets move onto the commands
VBox Commands
Before you do this please close VirtualBox to ensure the settings have been applied when your launch the VM!
INFO
Replace VM_NAME with the name you gave your Virtual Machine.
TIP
Make sure to keep the double quotes around your VM name!
For Linux users:
VBoxManage modifyvm "VM_NAME" --cpuidset 00000001 000106e5 00100800 0098e3fd bfebfbff
VBoxManage modifyvm "VM_NAME" --cpu-profile "Intel Core i7-6700K"
VBoxManage setextradata "VM_NAME" "VBoxInternal/Devices/efi/0/Config/DmiSystemProduct" "iMac19,1"
VBoxManage setextradata "VM_NAME" "VBoxInternal/Devices/efi/0/Config/DmiSystemVersion" "1.0"
VBoxManage setextradata "VM_NAME" "VBoxInternal/Devices/efi/0/Config/DmiBoardProduct" "Mac-AA95B1DDAB278B95"
VBoxManage setextradata "VM_NAME" "VBoxInternal/Devices/smc/0/Config/DeviceKey" "ourhardworkbythesewordsguardedpleasedontsteal(c)AppleComputerInc"
VBoxManage setextradata "VM_NAME" "VBoxInternal/Devices/smc/0/Config/GetKeyFromRealSMC" 1
VBoxManage setextradata "VM_NAME" "VBoxInternal/TM/TSCMode" "RealTSCOffset"

# Set the resolution to whatever you would like, this can be your actual dislay resolution or smaller
VBoxManage setextradata "VM_NAME" VBoxInternal2/EfiGraphicsResolution 1920x1080
# If your on a larger display (> 1440p) you may want to set this to `1.25`
# Scale factors are 1 = 100%, 1.25 = 125%, etc
VBoxManage setextradata "VM_NAME" GUI/ScaleFactor 1
For Windows users:
cd "C:\Program Files\Oracle\VirtualBox"
VBoxManage.exe modifyvm "VM_NAME" --cpuidset 00000001 000106e5 00100800 0098e3fd bfebfbff
VBoxManage.exe modifyvm "VM_NAME" --cpu-profile "Intel Core i7-6700K"
VBoxManage.exe setextradata "VM_NAME" "VBoxInternal/Devices/efi/0/Config/DmiSystemProduct" "iMac19,1"
VBoxManage.exe setextradata "VM_NAME" "VBoxInternal/Devices/efi/0/Config/DmiSystemVersion" "1.0"
VBoxManage.exe setextradata "VM_NAME" "VBoxInternal/Devices/efi/0/Config/DmiBoardProduct" "Mac-AA95B1DDAB278B95"
VBoxManage.exe setextradata "VM_NAME" "VBoxInternal/Devices/smc/0/Config/DeviceKey" "ourhardworkbythesewordsguardedpleasedontsteal(c)AppleComputerInc"
VBoxManage.exe setextradata "VM_NAME" "VBoxInternal/Devices/smc/0/Config/GetKeyFromRealSMC" 1
VBoxManage.exe setextradata "VM_NAME" "VBoxInternal/TM/TSCMode" "RealTSCOffset"

# Set the resolution to whatever you would like, this can be your actual dislay resolution or smaller
VBoxManage.exe setextradata "VM_NAME" VBoxInternal2/EfiGraphicsResolution 1920x1080
# If your on a larger display (> 1440p) you may want to set this to `1.25`
# Scale factors are 1 = 100%, 1.25 = 125%, etc
VBoxManage.exe setextradata "VM_NAME" GUI/ScaleFactor 1
Installing MacOS
Start the Virtual Machine but DO NOT ENTER FULLSCREEN this breaks MacOS for whatever reason and it will likely be invisible.
If you want to go into fullscreen use your window managers fullscreen toggle and right click on the top and bottom bars and then toggle them off so the VM will match your screen resolution.
Once MacOS has booted to the language screen select your language and continue.
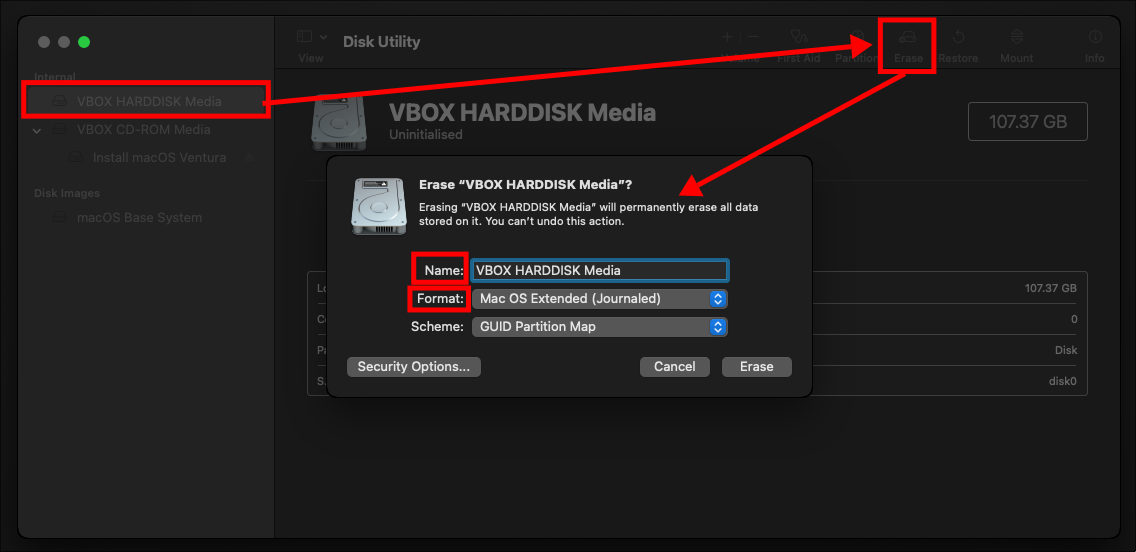
Next select Disk Utility, select VBOX HARDDISK Media, then Erase, then set the Name of the drive to whatever you would like but I suggest always just renaming it to be the same as what it was so "VBOX HARDDISK Media".
MAKE SURE TO SET THE FORMAT TO MacOS Extended Journaled OR THE INSTALL WILL PROBABLY FAIL
After that has completed simply close out of the Disk Utility by clicking the red circle in the top left corner of the window.
Then select "Install macOS -Version-" and Continue.
On the next screen just click Continue again, Agree to the license agreement and then select the disk we just formatted and Continue!
INFO
If the disk does not appear go back to the Disk Utility and check your formatted the drive correctly!
Now just wait 30 minutes and you should be inside the macOS first time setup!
TIP
If the VM goes into a boot loop saying "The system panicked", then either you did something wrong, the ISO you used is faulty, or you just got unlucky and your hardware isn't compatable.
Extra Tips
Once your on macOS you may notice everything is a bit visually sluggish, this cannot be avoided unfortunatley due to how Virtual Machines emulate graphics through software processing.
To make it somewhat endurable below I have linked a short guide on how to speed up macOS.
If you need to enter the recovery partition to do stuff like disabling csrutil then follow this awesome guide by end2endzone.